A chemical peel can refresh your complexion, soften pigmentation, and improve skin texture – but the results depend heavily on how well you care for your skin during the recovery period. The first week is the most important time for healing.
Here is a day-by-day guide to what your skin needs, what is normal, and how to get the best outcome.
Day 1 – Calm, Protect, Don’t Touch
Skin usually feels warm, tight, and slightly burning, similar to a sunburn. Redness and mild swelling are common, especially after medium-depth peels.
Care routine:
- Cleanse only with cool water or a very gentle, soap-free cleanser.
- Apply a thick healing ointment or bland moisturizer recommended by your provider.
- Use broad-spectrum SPF 30–50 even indoors near windows.
- Avoid makeup, workouts, hot showers, saunas, and alcohol.
Typical mistakes: touching the face, applying active products like retinol or acids, trying to “neutralize” the peel with home remedies.
Day 2 – Hydration Is Your Best Friend
Tightness may increase, and skin can look shiny or darker in treated areas. This is the beginning of the regeneration process.
Care routine:
- Cleanse once or twice gently – no scrubs or washcloths.
- Reapply moisturizer whenever skin feels dry.
- Continue SPF and limit sun exposure.
- Sleep on a clean pillowcase and preferably on your back.
Recommended products:
- Babor Rejuvenating Moisturizer – deeply hydrates, strengthens skin barrier, and reduces tightness.
- Paula’s Choice Calm Redness Relief Repairing Serum – soothes irritation, promotes healing, and balances moisture.
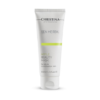
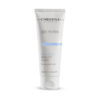
- Christina Super Peeling Calm Cream – enriched with soothing agents, helps reduce flaking and sensitivity.
Typical mistakes: using cleansing brushes, taking long hot baths, wearing heavy foundation to hide redness.
Day 3 – Peeling Begins
Fine flaking often starts around the mouth, nose, or forehead. It can be uneven and sometimes itchy.
Care routine:
- Let skin shed naturally.
- You may use mineral powder or light tinted sunscreen if your clinician approves.
- Drink plenty of water; consider a humidifier at home.
Typical mistakes: pulling loose skin with fingers or tweezers, applying cortisone cream without medical advice.

Day 4 – Be Patient With the Process
Flaking becomes more visible; skin may feel rough. Color can temporarily appear blotchy.
Care routine:
- Short contact cleansing only with hands.
- Add soothing ingredients: panthenol, ceramides, thermal water sprays.
- No swimming pools or beach.
Typical mistakes: trying to speed peeling with steam, applying essential oils, self-prescribed whitening creams.
Day 5 – Gentle Return to Normal Life
Most light peels reach their peak shedding now. Underneath, new skin is pink and sensitive.
Care routine:
- Non-comedogenic moisturizer morning and night.
- You can return to simple eye makeup or lipstick; avoid products on peeling zones.
- Continue to skip intense exercise.
Typical mistakes: restarting glycolic cleanser or vitamin A too early, waxing brows or upper lip.
Day 6 – Strengthen the Barrier
Sensitivity decreases, but the protective layer is still weak.
Care routine:
- Keep using barrier-repair creams with peptides and ceramides.
- If no open areas remain, light BB cream may be acceptable.
- Avoid long outdoor walks at midday.
Recommended products:
- Babor Hydro Balance Cream – restores moisture, strengthens skin barrier, and promotes healing.
- Paula’s Choice Resist Barrier Repair Moisturizer – rich in ceramides and peptides for long-lasting repair.
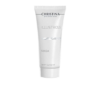
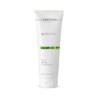
- Christina Super Peeling Recovery Balm – supports regeneration, calms redness, and keeps skin soft.
Typical mistakes: forgetting SPF because peeling looks almost finished.
Day 7 – Transition Phase
Skin feels smoother, pores look smaller, and brightness improves. Some residual pinkness can last a few more days.
Care routine:
- Introduce mild antioxidant serum (for example, low-strength vitamin C) only if approved.
- Book follow-up appointment to evaluate results and plan next steps.
Typical mistakes: applying strong retinol, scheduling another peel immediately, experimenting with new skincare brands.
What Is Normal During Week One?
- Redness from 24 hours to 5–6 days depending on peel depth
- Darkening of spots before they lighten
- Itching and tight feeling
- Uneven peeling pattern
What Requires a Call to Your Provider?
- Yellow crusts, pus, increasing pain
- Fever blisters or history of herpes without prophylaxis
- Severe swelling around eyes
- No peeling at all after a medium peel (may indicate neutralization issues)
Universal Aftercare Rules
- No actives: retinoids, AHAs/BHAs, benzoyl peroxide, fragranced creams.
- No picking: premature removal can cause scars and post-inflammatory hyperpigmentation.
- Photoprotection: SPF is mandatory for at least 2 weeks; reapply every 2 hours outside.
- Heat avoidance: heat increases inflammation and depth of injury.
- Minimalism: bland, boring products heal best.
Long-Term Tips
Continue gentle care for another week after day seven. Most clinicians allow retinol only after 10-14 days for light peels and 3-4 weeks for medium peels. Maintenance treatments spaced correctly give safer, cumulative improvement.
Why Aftercare Matters
A chemical peel creates controlled damage to trigger new collagen and even pigment distribution. The newborn epidermis has fewer defenses; correct moisturizing and sunscreen let cells organize beautifully.
Think of the first 7 days as part two of the procedure – the home phase where you guard the investment you just made.
Disclaimer: Some products above may include affiliate links. Purchasing through these links may earn the website a small commission at no extra cost to you. Always consult your skin care professional before trying new products, especially after chemical peels.